
Make a Raffia Garden Hat
Raffia is created from the leaves of palm trees native to tropical regions of Africa and Central and South America. The leaves are the longest in the plant kingdom and can reach lengths of up to 65 feet. There are many different types of raffia, some softer than others. Make sure you buy raffia that is neither too soft nor too stiff. You can also purchase pre-braided raffia.
Supplies
- You will need raffia, a hat form, a cork board, measuring tape, scissors, pins (T-pins work best), needles (1 curved upholstery needle and 1 darning needle, both with large eyes), and a headband (optional, see below). Find hat-making supplies at your local craft store or at www.franksupply.com.
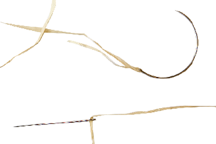 4" curved upholstery needle
darning needle
4" curved upholstery needle
darning needle
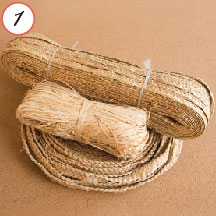
- A hat form (also known as a hat block or bashing block) is essential for raffia-hat making. Poly blocks (b and c) are cheaper and much easier to pin into than wooden blocks (a). Measure your head before you purchase a hat form. You can even make a simple hat form out of cardboard and duct tape.
|
|
Braiding
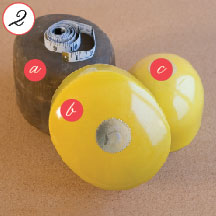
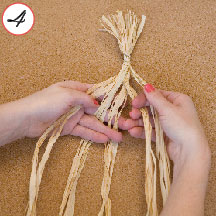
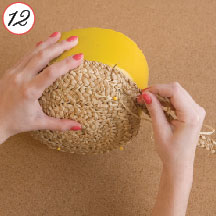
- You’ll make a five-strand braid, which lies flat and is more like a weave than a braid. Select 20 strands of raffia. Leaving about 4″ at one end, wrap an additional piece of raffia tightly around your strands and pin them down to the cork board (this will keep your braid from shifting while you work with it). Separate the strands into five sections, and taking the far left section (the working strand), pass it over the second left section.
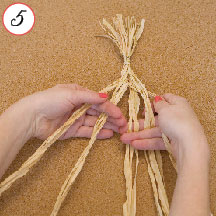
- Weave the working strand under the third, over the fourth, and under the fifth sections. Flatten the strands between your thumb and forefinger as you work with the braid, but don’t apply too much tension, since that will make your braid too tight and difficult to form and stitch.
- Repeat the weaving process until you’ve used at least 9 oz of raffia, always using the outer left strand as your new working strand. Work new sections of raffia into the braid when you see a strand decreasing in width.
- To finish, pass the far right section over the inner right section and wrap the end with another piece of raffia.
|
|
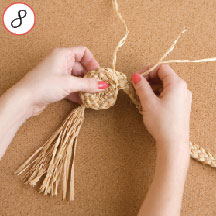
Stitching
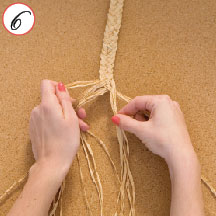
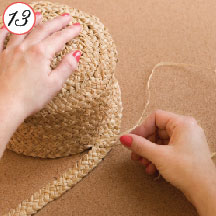
- Thread the straight needle with a strand of raffia. Holding the braid in your left hand, coil it around in a circle that is about 3″ wide and stitch.
- As you stitch, work across and along the edge of the braid, passing through a strand of the braid. Curve the braid gently as you stitch to form the top of your hat.
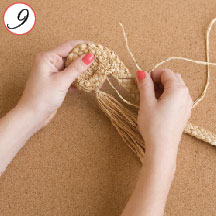
- Continue coiling and stitching, easing in the braid with your fingers to ensure it lays flat as you stitch. Don’t apply tension or your braid will curl up.
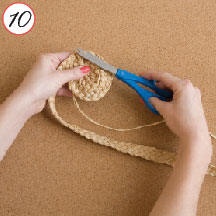
- Once you have stitched about 4″ in diameter, turn your sewn piece over and trim off the “raffia tail” from the start of the braid. Continue to coil and stitch until your sewn piece is the size of the top of your hat block.
|
|
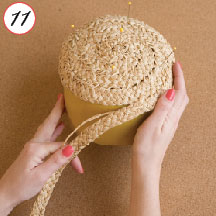
Forming the Crown
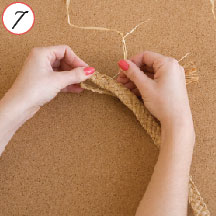
- Pin your sewn piece securely to the top of your hat block. The edge of your sewn piece and the edge of the top of the hat block should meet, with the loose braid aligned to the back center of the hat block.
- Thread the curved needle with a strand of raffia and continue stitching along the edge of the braid. Use your hands to mold the braid to the hat form as you stitch and frequently add pins to help the sewn piece stay in place. To work in a new raffia thread, loop your old thread through the braid several times, then rethread your needle and begin the new raffia thread several loops back in the braid. Continue this process of stitching until your crown is the right height for your style of hat. End your stitching when the braid is aligned to the back center.
|
|
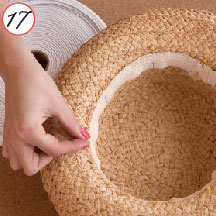
Forming the Brim
- Turn the braid out at a right angle to the crown and begin stitching with the hat block flush to the cork board. Curve the braid gently around the crown as you stitch, easing it in with your fingers. Do not apply tension or the shape of the brim will be distorted.
- To form the curve of your brim, use your left hand to hold the braid at an angle while you stitch the braid with your right. You can steam it later to correct the shape slightly.
- When your brim is nearly the size you want it, wrap the braid around until it aligns to the back center and measure an additional 8″ (this will be the loose raffia you weave into the brim), and cut off the rest of the braid. Unbraid the raffia to the center front of the hat. Rebraid the raffia while tapering the braid by cutting out single strands of raffia as you go, ending with a width of ¼″ and leaving about 8″ unbraided at the end. Stitch as before until you’re about ¾″ from the back center, then gradually overlap the braid for about 2″, stitching the end of the braid over the previous row. Using the curved needle, finish by threading the loose ends of raffia through the brim one at a time.
- Steam will allow you to mold your hat into the desired shape, but it can burn you very easily, so wear heat-protective gloves during this step. Wrap a dishtowel around the inside of the hat brim and hold a section over a steaming kettle, carefully reshaping with your fingers.
|

|
- Optional: Add a stretch-terry headband. Cut a length of the headband that feels comfortable, but secure, to your head and add 1″. Fold over ½″ and pin to overlap the other cut edge ½″; stitch. Pin headband to crown along edge closest to brim and slip-stitch to hat.
|
|
Raffia Hat Brim Styles
Have fun creating your own style or use one of the following:
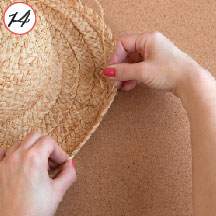
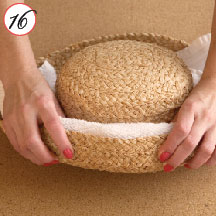
- Breton style: Steps 14 and 16 show how to create an upturned rim as worn by MaryJane in the photo immediately above.
- To create the hat Denali is wearing in the photo at the top, turn the last section of the braid up at a right angle as you sew the last row on your brim, using a tight stitch.
- Beach-hat style: this is the easiest, as it has a large, flat brim that requires no shaping.
|
|